
Introduction
Accidents can happen at any time, and knowing how to handle bleeding effectively through first aid can make a significant difference in preventing further harm. Whether it’s a minor cut or a more severe injury, quick action can help control bleeding and promote faster healing. In this guide, we will discuss three essential first-aid techniques to stop bleeding promptly and efficiently.
Direct Pressure
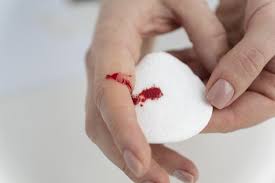
The most immediate and straightforward method to control bleeding is through direct pressure. Follow these steps:
Cleanse: Before applying pressure, wash your hands with soap and water or use a hand sanitizer to prevent infection. If possible, clean the wound with mild soap and water to remove any debris or dirt.
Dress the wound: If available, put on disposable gloves or use a clean cloth to avoid direct contact with the wound. Gently pat the wound dry with sterile gauze or a clean cloth.
Apply pressure: Using a sterile gauze pad or a clean cloth, apply firm and continuous pressure directly on the wound. Maintain the pressure for at least 10-15 minutes without lifting it to allow the blood to clot.
Elevate the injured limb: If the wound is on an arm or leg, raise it above the heart level. Elevating the limb can help reduce blood flow to the area and aid in clotting.
When looking to buy top-quality med or bleed kits make sure to visit this SAM Medical med store.
Pressure Points
When direct pressure alone is not enough to control bleeding, using pressure points can be helpful. However, this technique should only be used in situations where bleeding is severe and direct pressure hasn’t been successful. Follow these steps:
Locate the pressure point: For bleeding on the arm, apply pressure on the brachial artery, which is inside the upper arm between the bicep and triceps muscles. For leg bleeding, apply pressure on the femoral artery, located in the groin area where the leg meets the body.
Apply pressure: Use your fingers or knuckles to press firmly against the pressure point. Maintain the pressure until the bleeding subsides or medical help arrives.
Never use pressure points on neck injuries or wounds located on joints, as this can cause more harm.
Tourniquet Application
A tourniquet should be used as a last resort when all other methods fail or in life-threatening situations. An improvised tourniquet can be used temporarily until professional medical assistance is available. Follow these steps:
Find a suitable material: Use a belt, scarf, shirt, or any other wide and sturdy fabric to create the tourniquet.
Position the tourniquet: Place the tourniquet 2-3 inches above the wound (closer to the body). Avoid placing it over joints or bony areas.
Tighten the tourniquet: Twist or tie the fabric to tighten it around the limb. Stop twisting when the bleeding stops. Make a note of the time you applied the tourniquet to inform healthcare professionals.
Seek professional help: Tourniquets should not be left on for an extended period. As soon as possible, seek medical attention, as prolonged use can cause tissue damage.
Conclusion
Knowing how to stop bleeding with first aid techniques is a crucial skill that can save lives. Remember to remain calm, act swiftly, and prioritize your safety while providing assistance. Direct pressure, pressure points, and tourniquets are powerful tools that, when used correctly and responsibly, can help control bleeding effectively until medical help arrives. Always seek professional medical attention after administering first aid for any bleeding injuries.